Showing posts with label Windows. Show all posts

Friday, July 24, 2009

Completely Uninstall iTunes (Windows)


These are instructions on how to do a clean and complete uninstall of iTunes for Windows using Revo Uninstaller.

Before you begin download Revo Uninstaller from here onto your desktop. It is also highly suggested that you make a backup of your system as this procedure will remove registry entries. You can do this by selecting Back up your computer from Start:Control Panel:System and Maintenance.

Read more


via - iClarified.com

Download Free Norton AntiVirus, Internet Security 2010 Beta

Security leader Symantec now lets you download free Norton 2010 Beta products – Norton Internet Security 2010 and Norton AntiVirus 2010.

Remember these are “beta” pre-release versions of Norton products, made available for free download to beta software testers for public testing before the final version is released. This enables valuable feedback, bug reports and helps to develop a better quality software.

Norton Protection System is now powered with Norton Safe Web antispam engine and SONAR 2 technology that stops new and unknown threats. Norton Performance System protects your computer performance and Identity Safe is now portable. Norton Security 2010 software are now ready to protect Windows 7 running computers from all types of threats.

Via - quickonlinetips.com

Thursday, July 23, 2009

Windows 7 RTM (Release to Manufacturing) Announced

Today at Microsoft Global Exchange Conference (MGX), Microsoft has officially announced that Windows 7 and Windows Server 2008 R2 are complete and are now ready for Release to Manufacturing (RTM) to the OEM’s & other Partners.

OEM’s and Microsoft Partners will get the final bits in just under two days, which means that the debate over whether or not Windows 7 Build 7600.16385.090713-1255 is indeed the RTM build will be confirmed by this coming Friday. Connect, MSDN and TechNet subscribers will get it on 6th August, General availability on October 22nd.

Both x86 and x64 Builds of Windows 7 RTM Build 7600.16385.090713-1255 can be downloaded from here.

Congratulation to Windows 7 development team which was lead by Steven Sinofsky – President, Windows Division for completing one of the finest Windows releases ever.

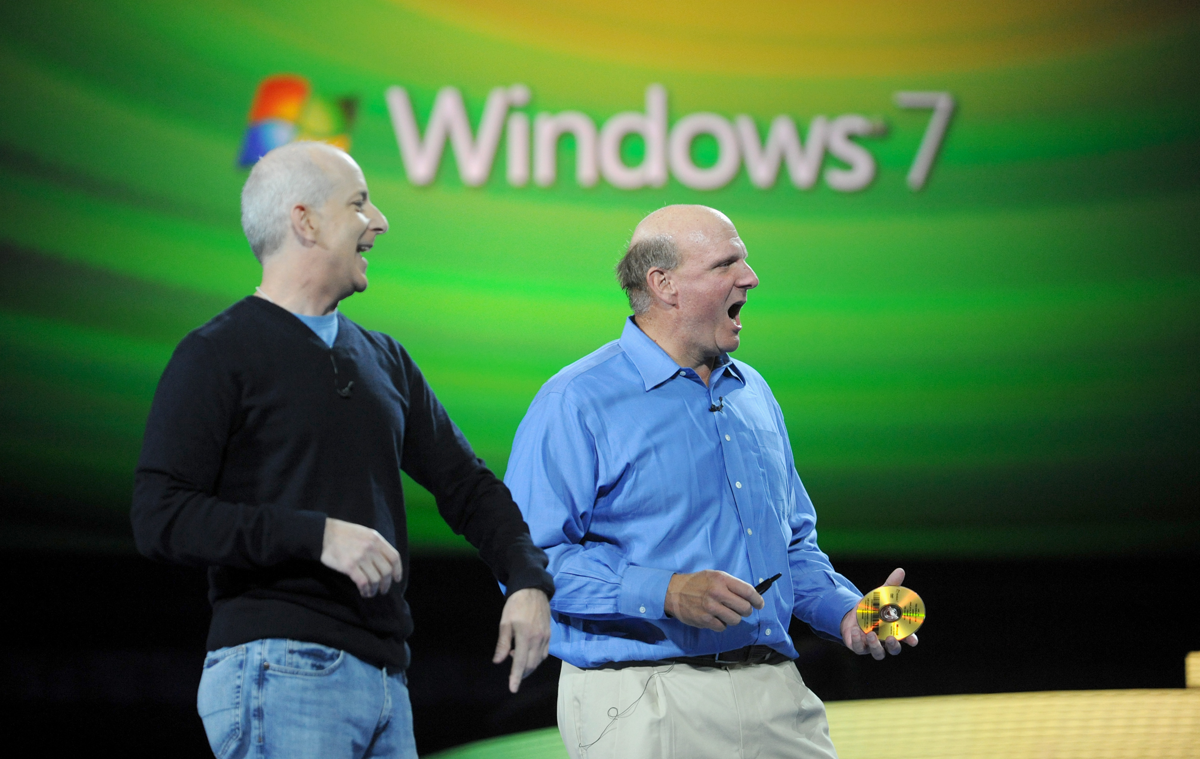
Steven Sinofsky & Steve Ballmer holding gold RTM disc at MGX. Steven Sinofsky & Steve Ballmer holding gold RTM disc at MGX.

UPDATE 1: It is now confirmed that Windows 7 Build 7600.16385.090713-1255 is indeed the final RTM. Download it from here.

via - redmondpie

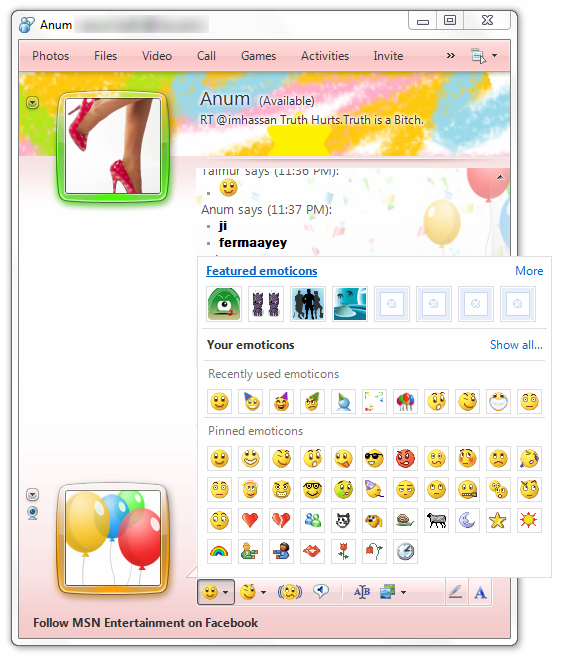
Download Windows Live Messenger 2009 Gift Pack

On the eve of Windows Live Messenger’s (formerly MSN Messenger) 10th anniversary, Windows Live Team has released a free messenger gift pack to celebrate the 10th birthday of the world’s largest IM network. The free gift pack includes new:

  • Display pictures
  • Emotions
  • Winks
  • backgrounds and more..

[Screenshots]

Download Windows Live Messenger 2009 Gift Pack for Free

via - redmondpie

Download Expression Studio 3

Today, Microsoft has finally shipped the final version of Expression Studio 3 and it can now be downloaded from Microsoft Download Center. Expression Studio 3 was announced alongside Silverlight 3 at a recently held launch event in San Francisco.

Microsoft Expression Studio opens up a new world of creative possibility. Its professional design tools give you the freedom to make your vision real—whether you’re designing for standards-based Web sites, rich desktop experiences, or Silverlight.

Expression Studio is a suite of tools which enables professional designers and developers to build rich applications for both web and Windows. The suite includes the following products/tools:

  • Expression Web 3 (with SuperPreview)
  • Expression Blend 3 + SketchFlow
  • Expression Design 3
  • Expression Encoder 3

Overview Expression Studio 3:

Check out this video below to see what’s new in Expression Studio 3?


Expression Studio 3 Overview Video

Download Expression Studio 3 (60 Days Trial)

Wednesday, July 22, 2009

Windows 7 RTM Availability

Brandon LeBlanc – the writer behind The Windows Team Blog has just posted more details on the availability of Windows 7 RTM bits:

  • Microsoft Connect, MSDN and TechNet subscribers will be able to get their hands on Windows 7 RTM on 6th August.
  • Microsoft Partner Program Gold/Certified Members will get it on August 16th.
  • Microsoft Action Pack Subscribers on 23rd August.
  • For Business Customers with access to Volume License Service Center (VLSC) will get their hands on the final bits on 7th August.
  • Retail Customers on 22nd October.

Microsoft is yet to publicly announce the final RTM Build of Windows 7. The fact that they didn’t call the latest leaked Windows 7 Build 7600.16385.090713-1255 as fake or not the final RTM makes me wonder whether Build 7600.16385.090713-1255 is indeed the final Build which Microsoft has already signed-off? Windows 7 Build 7600.16384 was previously quickly brushed off as not RTM when it was leaked on 12th July.


via - redmondpie

Tuesday, July 21, 2009

Windows 7 Media Center and Windows Home Server PP3

Windows Home Server Power Pack 3 Beta was released last week and it brought much needed and improved Media Center integration with Windows Home Server. Power Pack 2 added the functionality of making it easier to access content stored on a Home Server from a Media Center PC, Power Pack 3 takes it a step further!

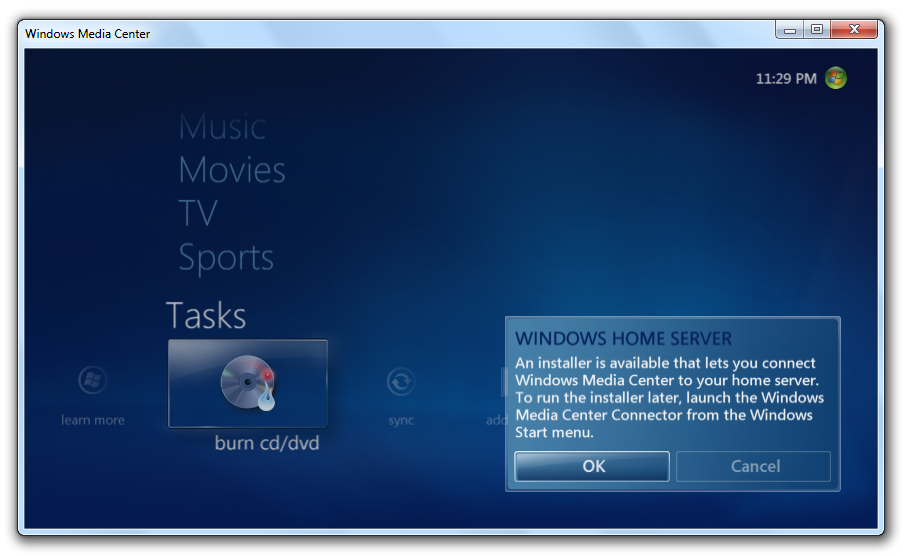
Once you have installed and configured the new Media Center Connector which ships with Power Pack 3, Windows Media Center will prompt you to install Media Center Connector:

After installation is completed, restart Media Center and you should now have a new “Home Server” tab on the Home screen of Media Center which includes the following two sub menus:

a. TV Archive

In addition to recording tv directly to the Home Server, you can now also move recordings from an existing Media Center PC to your Home Server with a click of a button. You can either move individual TV shows, a series of shows, or all the TV recordings to be automatically moved from Media Center PC to the Home Server. Moreover, you can also convert the recordings to play them back on a compatible portable device such as a Zune or a Windows Mobile phone (No support for iPhone or iPod Touch).

Read more

Sunday, July 19, 2009

Create a Glossy-looking Glass button in WPF

Tired of the usual look of your buttons in WPF? Do you want a glossy-looking button with glass shine and glow effect as soon as you move the mouse cursor over the button?

Its just six easy steps away …

Follow the tutorial below and give a fresh look to your apps.

Tools used :

  • Visual Studio 2008
  • Expression Blend

1. Create a new WPF Application

2. Create a Canvas

  • Add the rectangle from the toolbar on the left:

  • Drag the corners of the rectangle to the appropriate dimensions that is the size you want for the button.
  • Click on the rectangle.
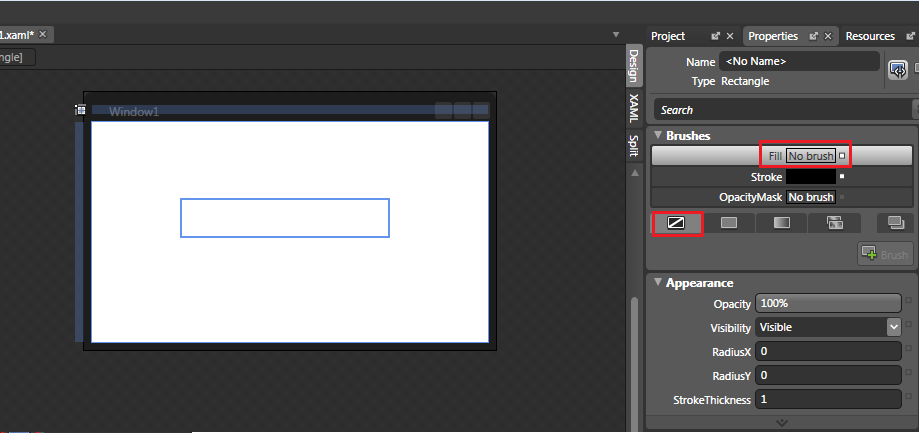
  • Select the 'Properties' tab on the right.
  • Select 'Fill' ->'No Brush'.

  • Select 'Stroke'->'No Brush'
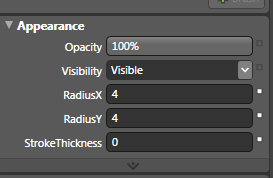
  • In the Appearance section, change the RadiusX and RadiusY properties to 4 (to make the corners rounded).
  • Make the stroke thickness 0 (stroke is boundary).

  • Right click on the rectangle you have created.
  • Copy it.
  • Paste it twice.

  • Your LayoutRoot should look similar to this:

  • Select the rectangle as shown:

  • Right click it.
  • Select 'Group Into'->'Canvas'

3. Create the Basecoat

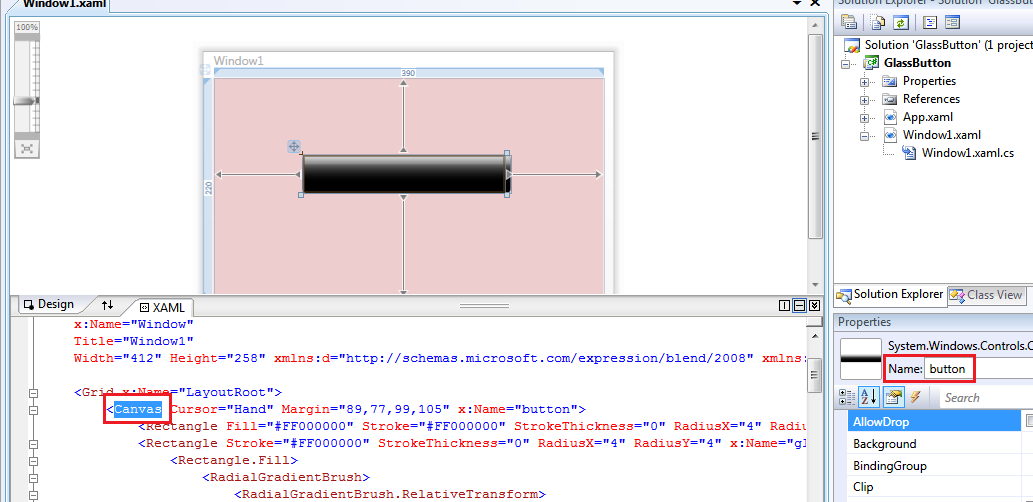
  • Rename the canvas as 'button' in the properties tab.

  • In the layout section section select the 'Hand' in the options for 'Cursor'

  • Click on the first rectangle from the top in the LayoutRoot:

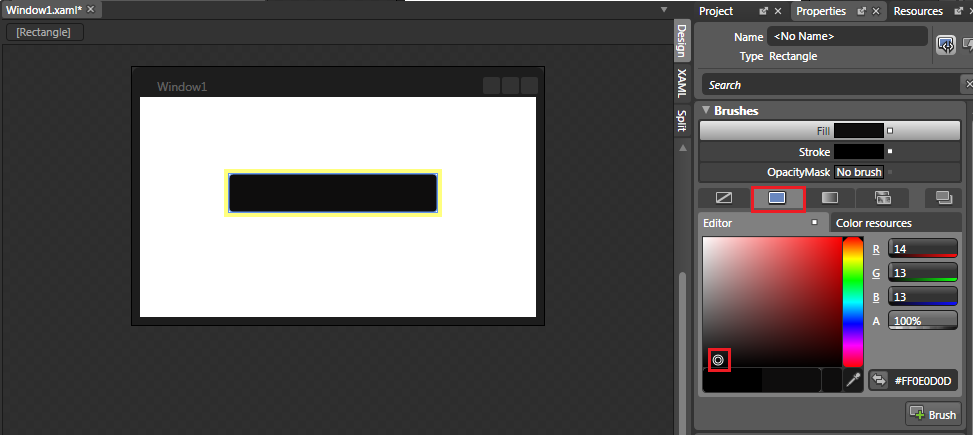
  • Select 'Fill' –> 'Solid Color Brush'
  • Select the color black in the editor.

  • Rename the rectangle in the properties tab as 'basecoat':

4. Create the Glow

  • Select the second rectangle from the LayoutRoot as before
  • Name it 'glow' in the properties tab
  • Select 'Fill'-> 'Gradient Brush'->'Radial Gradient'

  • Click on 'Brush Transform' in the toolbox on the left :

The brush transform will be used to adjust the positioning of the gradient.

  • Drag the bottom of the rectangle a little to enlarge the gradient vertically:

  • Move your cursor around at middle of the rectangle until you see the four headed cursor.
  • Drag the highlight down a little:

  • Select 'Fill'->'Gradient Brush'->'Linear Gradient'
  • Click the first gradient stop and select the color you want for the glowing effect.

  • Select the second gradient stop.
  • Reduce the A value to 0 to achieve transparency.

  • Make the opacity 0% for now in the Appearance section:

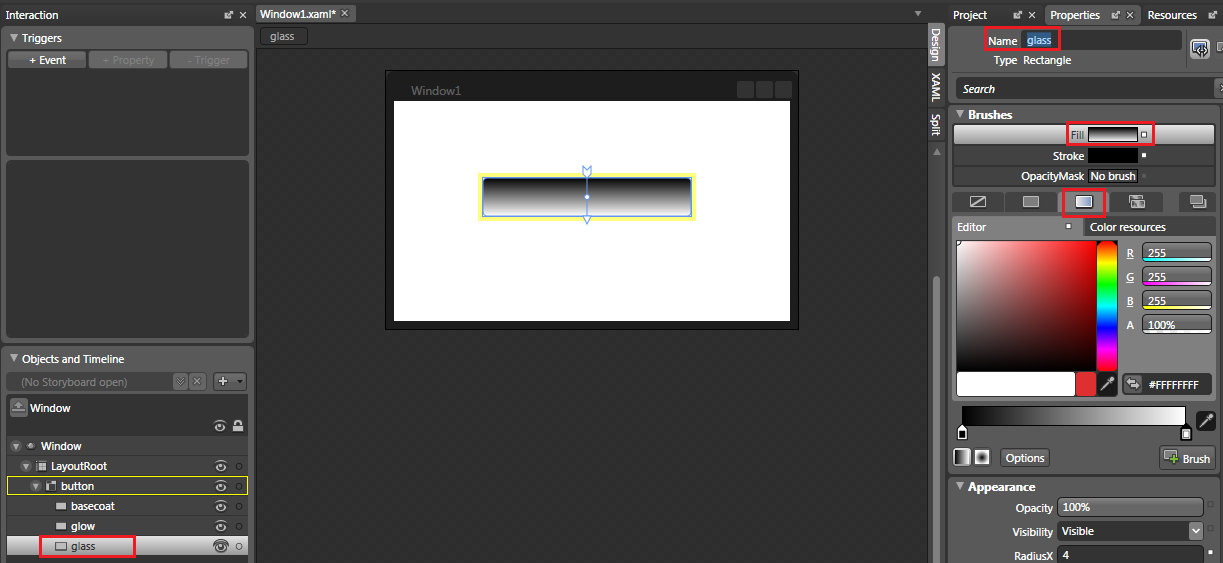
5. Create the Glass Effect

  • Select the third rectangle.
  • Name it 'glass'.
  • Select 'Fill'->'Gradient Brush'->'Linear Gradient'

  • Select the 'Brush Transform'
  • Select the back of the arrow and rotate it to alter the gradient accordingly:

  • Move your cursor around at the top middle part of the rectangle until you see the cursor as a hand:

  • Drag the cursor in to the rectangle (as if pushing something into a box from the top) until you see something like this :

  • Select the first gradient stop.
  • Set A to 0

  • Click twice on the gradient bar at around 60% to get two gradient stops.
  • Get one gradient stop a few percentages lower than the other.

  • You can see the glassy effect in your window:

  • Alter the Opacity to 80%.

6. Code a little

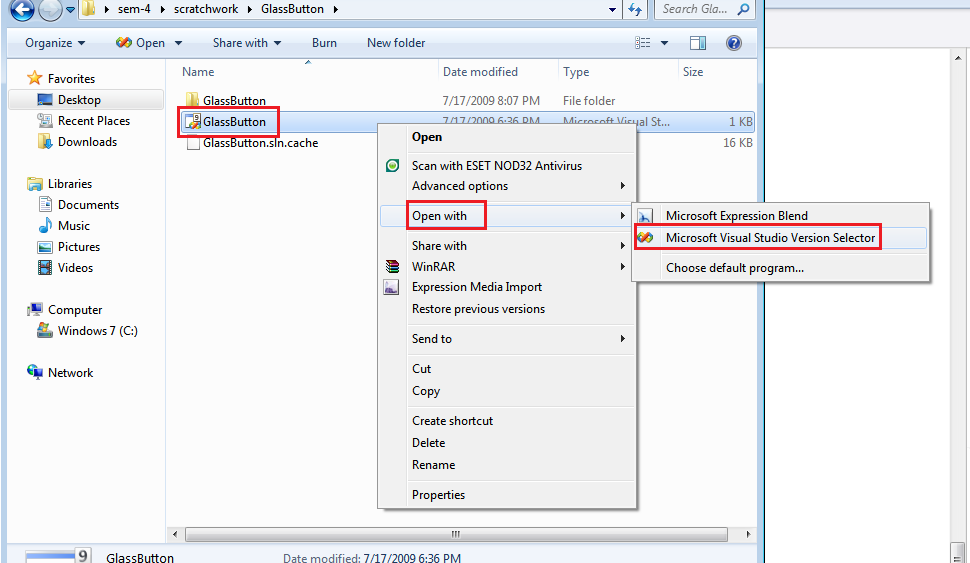
  • Save your project in Blend and close it.
  • Open your project with Visual Studio.

  • Double click 'Canvas' in the xaml code of the window:

Don't get confused with the pink color. I just changed the background color for testing.

  • Select the 'Event' option in the properties window.
  • Double click on the column to the right of Mouse Enter.
  • Double click on the column to the right of Mouse Leave.

The double clicking caused the xaml code of the window and the method headers to be automatically generated for the events.

  • Enter the following code to make the glow appear only when the mouse is over the button:

        private void button_MouseEnter(object sender, MouseEventArgs e)
        {
            glow.Opacity = 100;
        }
 
        private void button_MouseLeave(object sender, MouseEventArgs e)
        {
            glow.Opacity = 0;
        }
 

And you are done :D
Your queries are always welcome!

via - redmondpie.com

Based on original Visionary template by Justin Tadlock
Visionary Reloaded theme by Blogger Templates

Visionary WordPress Theme by Justin Tadlock Powered by Blogger, state-of-the-art semantic personal publishing platform